

So you’ve finally taken the plunge and had that unwanted or problematic tree removed from your Markham property. Whether it was casting too much shade, causing foundation issues, or simply past its prime, the tree’s departure is a positive step. But the job isn’t quite finished yet. Proper aftercare is crucial for ensuring your landscape recovers smoothly and thrives in the absence of the removed tree.
The next step after removing a tree is typically to get rid of the stump. However, there’s more to it than using your handy-dandy stump grinder to make the stump go away. Before you even start, it helps to know what to expect after you’ve removed your tree. Check out this short guide to post-tree removal tips for Markham homeowners to help you navigate this transitional period and nurture a healthy, vibrant landscape.

1. Grinding the Stump: A Wise Investment
While some homeowners opt to leave the stump behind, grinding it down is generally the preferred course of action. Stumps can become unsightly eyesores, attract pests, and hinder future landscaping plans. Stump removal creates a manageable woodchip mulch pile that can be used for various purposes around your yard, like path edging or garden bed mulch.
When considering stump grinding, think about the size of the stump. Larger stumps necessitate professional stump grinding for reasons of safety and efficiency. Professionals can also assess the tree’s root system and ensure proper grinding depth to prevent future sprouting.
2. Filling the Hole: Addressing the Void
Tree removal leaves behind a sizable hole, and neglecting it can have negative consequences. The empty space can disrupt your yard’s aesthetics, create a tripping hazard, and attract unwanted critters. Here’s how to address the void:
- Filling with Soil: The most common approach is to fill the hole with topsoil conducive to plant growth. Professionals can recommend the appropriate type and amount of soil based on the size of the hole and your landscaping plans.
- Compacting the Soil: Settling is inevitable, so ensure the fill soil is compacted in layers to minimize sinking and maintain a level surface. This step prevents water pooling and potential erosion.
- Seeding or Sodding: Once filled and compacted, consider planting grass seed or laying sod over the area. This step helps prevent erosion, promotes new growth, and blends the filled area seamlessly into your existing lawn.
3. Root Management: Considering the Root System
Tree roots can extend far beyond the dripline (the outermost area covered by the tree’s canopy). When a tree is removed, these roots begin to decompose, creating an opportunity for suckers or sprouts to emerge. Here’s how to manage the root system:
- Grinding Larger Roots: If the tree had a significant root system, consider having larger roots ground down during the stump grinding process. This minimizes the potential for future sprouting and makes the area more manageable.
- Monitoring for Sprouts: Keep an eye out for suckers or sprouts emerging from the root system. These can be easily removed with a shovel or herbicide applied according to the manufacturer’s instructions. Be sure to identify the type of sprout to choose the most effective removal method.
- Root Barrier Installation: For trees with particularly aggressive root systems, consider installing a root barrier around the planting area. This can help prevent future root encroachment on walkways, driveways, or foundations. Consult a professional landscaper to determine if root barrier installation is necessary for your situation.
4. Watering and Mulching: Nurturing New Growth
The area disturbed by tree removal will likely require additional care, particularly with regards to moisture retention. Here’s how to promote healthy growth:
- Watering Regularly: Exposed soil tends to dry out faster, especially during hot summer months. Water the area deeply and regularly, allowing the water to penetrate the root zone. Monitor the moisture level and adjust your watering frequency accordingly.
- Applying Mulch: Adding a layer of mulch around the filled area and any newly planted grass or shrubs helps retain moisture, suppress weeds, and regulate soil temperature. Choose a 5-centimetre layer of organic mulch like wood chips or shredded bark, keeping the mulch away from the base of trees or shrubs to prevent disease.
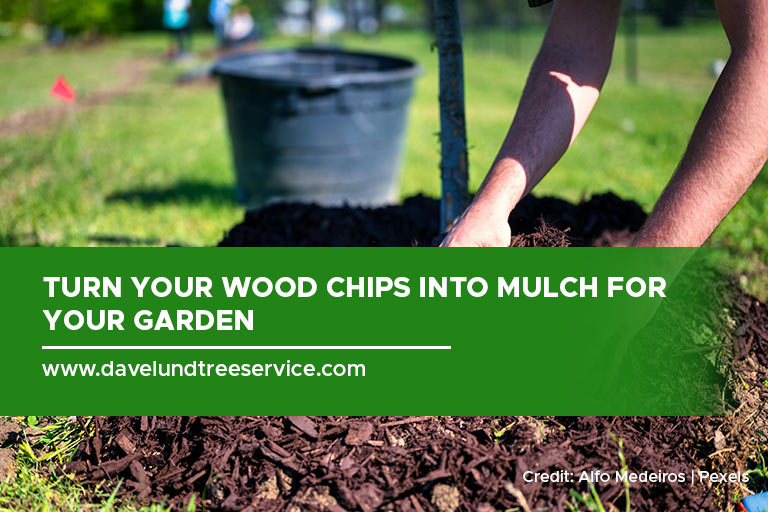
5. Utilizing the Wood Chips: Turning Waste into Resource
The wood chips generated from stump grinding can be a valuable resource in your landscaping endeavors. Here are some ways to put them to good use:
- Mulch for Garden Beds: Wood chips are a great addition to garden beds, helping retain moisture, suppress weeds, and gradually decompose, adding nutrients to the soil.
- Path Edging: Create a defined and attractive border for your garden beds or walkways using wood chips.
- Composting (with limitations): While not ideal for traditional composting due to slow decomposition, wood chips can be added to compost piles in small amounts to provide aeration and balance out green materials.
6. Considering New Plantings: Filling the Void with Beauty
With the empty space addressed, you might be considering planting a new tree or shrub. While programs like the 2 Billion Trees Program are seeing some success, there’s no reason you can’t do your part for the environment and plant a tree on your own. Here are some factors to keep in mind when selecting new plantings for the vacated spot:
- Sun Exposure: The amount of sunlight the area receives throughout the day is crucial. Consider sun-loving varieties if the area receives full sun, while shade-tolerant options are better suited for areas with limited direct sunlight.
- Mature Size: Think about the mature size of the new tree or shrub and choose one that won’t outgrow the space or pose future problems with power lines, buildings, or walkways.
- Root System: If root encroachment was a concern with the removed tree, opt for a species with a less aggressive root system to minimize potential issues with foundations or underground utilities.
- Soil Conditions: Research the soil type and drainage in the area. Choose plants that thrive in those conditions to ensure their success.
Consulting with a professional arborist or landscaper can be invaluable in selecting the ideal replacement plant for your specific situation. They can assess the sunlight conditions, soil type, and desired aesthetics to recommend suitable options.
7. Patience is Key: Allowing Time for Recovery
Remember, your landscape has undergone a significant change with the removal of a tree. Allow the disturbed area sufficient time to recover and adjust. Some events to expect include:
- Settling: The filled hole will likely settle over time, especially after heavy rains. Be prepared to add more soil as needed to maintain a level surface.
- New Growth: Any newly planted grass or shrubs will require time to establish a strong root system. Consistent watering and proper care are essential during this initial growth phase.
- Weed Control: Disturbed soil can also be more susceptible to weed growth. Regularly remove weeds to prevent them from competing with your new plantings for resources.
8. Professional Help When Needed: Seeking Expert Guidance
While many aftercare tasks can be tackled by DIY enthusiasts, there are situations where seeking professional help from a qualified arborist or landscaper is recommended. Some instances when professional assistance might be warranted include:
- Large or Complex Removals: If the removed tree was particularly large or had a complex root system, consulting a professional for stump grinding, root management, and aftercare advice is prudent.
- Soil Testing and Amending: Unsure about your soil type or if amendments are needed for optimal plant growth? A soil test conducted by a professional can provide valuable insights and recommendations.
- New Planting Selection and Placement: Seeking guidance from an arborist or landscaper can ensure you select the right plant for the vacated spot, considering factors like sunlight, mature size, and root system. Take note of your space as well. Even small gardens can find the right tree to give your landscape a touch of nature that doesn’t take up much space.
9. Seasonal Considerations: Adapting Your Care Routine
Remember, your aftercare routine might need to be adjusted based on the season. Here are some seasonal tips:
- Spring and Summer: Focus on regular watering, especially during hot and dry periods. Apply a fresh layer of mulch if needed. Monitor for pests and diseases and address them promptly.
- Fall: Continue watering as needed, but gradually reduce frequency as temperatures cool down. Apply a winter mulch layer around newly planted trees or shrubs for added protection.
- Winter: Watering requirements will be minimal during winter dormancy. Protect newly planted trees or shrubs from harsh winter conditions with burlap or other suitable coverings.
10. Enjoying the Renewed Landscape: Embracing the Change
With proper aftercare, the area where the tree once stood will transform into a thriving and beautiful space. Take pride in your efforts and enjoy the renewed aesthetics and functionality of your Markham landscape.
Remember, a healthy landscape not only enhances your property’s curb appeal but also provides valuable environmental benefits like improved air quality, reduced stormwater runoff, and increased wildlife habitat. By following these aftercare essentials, you can ensure a smooth transition for your landscape and pave the way for a flourishing future.
When it comes to tree-removal and the after-care, Dave Lund Tree Service & Forestry Co. Ltd. a call. With over 40 years’ experience, our team has the training and expertise to offer you expert advice after a tree removal. Give us a call now at (905) 884-0511 to get the tree care you need.